If you’re a kayaking beginner or want to get started with this exciting (and addictive) hobby, you need to learn about the proper kayak paddling technique. After all, the paddling techniques you know will allow you to control your kayak, and without proper control, you won’t be able to do what you want to do and go where you want to go.
In this guide for beginners, I’ll provide a basic overview of how to hold your kayak paddle, how to paddle efficiently, and how to master an effective forward stroke.
5 Things to Master for Proper Kayak Paddling Technique
In order to learn how to paddle your kayak correctly, you must be able to use your paddle to:
- Achieve the most efficient strokes
- Perform a forward stroke
- Perform a draw stroke in order to move your kayak in a sideways direction
- Turn your kayak by doing a sweep stroke
- Perform a reverse stroke for backing up and slowing your vessel down
My Kayak has a Rudder, Do I Still Need Proper Technique?
My first experience in a kayak was sea kayaking the coast of Maine in a large kayak with a rudder controlled by foot pedals. I was experienced in a canoe, and took for granted that steering my kayak would be incredibly easy by comparison.
But what I quickly learned was that improper paddling form made me work a lot harder, and left me feeling sore.
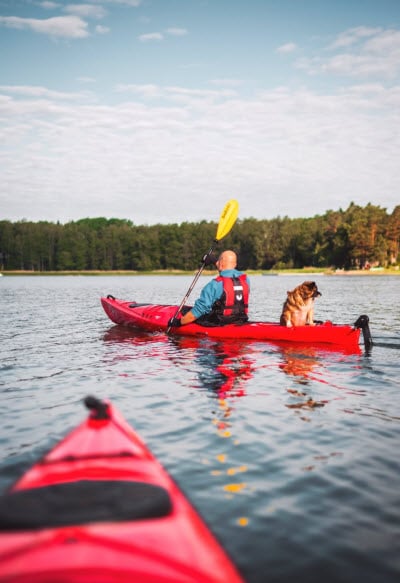
That’s why I recommend when you’re starting out that even if your kayak has a skeg or rudder, leave it out of the water.
The goal of practicing paddling your kayak is to perfect your stroke technique. You’ll build muscle memory, and be sure that every paddle stroke is efficient, propelling your kayak to track straight and turn as a result of your own movements.
You never know when your rudder may fail, and the strokes I’ll teach you in this article could make a huge difference on the water.
Where to Practice Kayak Strokes
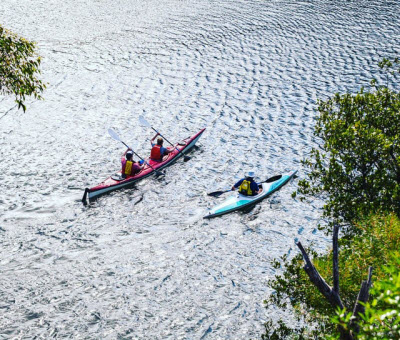
The best environment for practicing your kayaking is a safe and calm one. You can move on to more adventurous contexts once you’ve mastered your techniques in flat water.
I recommend that before you begin kayaking, you consider taking a course or lessons from an experienced instructor or guide. There’s really no substitute for first-hand wisdom imparted directly to you on the water from an experienced paddler.
The Value of Proper Kayak Paddling Form
One of the reasons why it’s so important to learn correct paddling technique before you kayak is that if you use incorrect ones, not only will you have trouble moving as you wish but you’ll cause your body more strain and you’ll tire more quickly.
Your kayaking guide or instructor will teach you the way to hold your paddles as you should, so every ounce of energy you exert is efficient, and you’ll get the most leverage and power from each and every stroke.
The 4 Keys to Holding a Kayak Paddle Correctly
There are four key points to learn in order to hold your kayak paddle properly. These are:
- Be aware of what type of paddle blade you’re working with
- Ensure correct orientation of the blades
- Adjust the place where you grip the shaft
- Ensure your hands are relaxed on the shaft of the paddle
How to Know What Type of Paddle Blades You Have
After you’ve chosen the right kayak paddle for you and before you start practicing your form, you should become acquainted with your paddle blades. You need to consider the following questions:
- Do the blades have asymmetry? You’ll know your blades are asymmetrical if one side of each of the blades is a bit shorter than the other. It’s possible that there will be only a slight difference, so look quite carefully. A slightly asymmetrical paddle helps you paddle in a straight direction (rather than spin). If your paddle is a uniform oval, the blades are symmetrical. Either type of blade is fine, but you need to know which kind you have in order to use it properly.
- Do you have matched or feathered blades? Matched blades are parallel while feathered blades are positioned at an angle to one another. If you have matched blades, you’ll find the process of learning to use them easier. If you have feathered ones, find the push-button and holes that circle the shaft at the center of the shaft. You should press the button and then adjust the two shaft halves, bringing them parallel.
- Do you have slightly concave (or curved) blades? Most of the time, the answer to this question will be yes. If this is the case, look at the direction the concave side faces when you’re holding the shaft. You’ll be able to “grab” a larger amount of water, thus creating a more effective stroke.
Starting to Use Your Paddle
Once you’ve become acquainted with your paddle, it’s time to start learning to use it. You must begin by orienting the paddle blades.
Pick up your paddle and hold it before you. Ensure that your blades are perpendicular to the ground’s surface and that your large knuckles are pointed upwards. The shorter side of each of the blades should be on the bottom. If you have symmetrical blades, though, this won’t be something you need to worry about. Finally, you need to ensure that each blade’s concave side is facing you. This won’t be something to worry about if you have entirely flat blades.
Once you’ve oriented the paddle, you need to adjust the place at which you hold the shaft. To do this, rest the centerpoint of the shaft of the paddle on your head. After that, readjust where you grip along the paddle’s shaft so that your elbows end up positioned at a 90-degree angle. After this is accomplished, when you bring the paddle down before you, it will be positioned in “the paddler’s box.” “The paddler’s box” is a shape that is made using your chest, arms, and the shaft. It’s important that you keep up this box position as you do your strokes. It will ensure that your torso is positioned correctly as you rotate it. This is essential to proper technique.
As you paddle, keep your grip relatively relaxed. This will help you prevent fatigue and strain of the hands, wrists, and arms. It also ensures that you depend more on your torso when propelling your kayak. In order to establish a relaxed grip, first create an “O” shape around the shaft. This should be done using your thumb and index finger. Your remaining fingers should rest only lightly on your paddle’s shaft.
How to do a Forward Stroke
For obvious reasons, the forward stroke is the most fundamental kayaking stroke. It’s the one that you will be doing for the majority of the time you’re on the water. Remember that you have to use more than just arm power in this stroke. The torso muscles, including the back and core, need to go into the task.
The forward stroke has three phases:
- The catch phase,
- The power phase, and
- The release phase.
In the catch phase, you wind your torso area and then immerse the blade of your paddle completely on a single side of the boat beside your feet.
In the power phase, rotate your torso during the movement in which the blade moves behind you. Your torso will follow as long as you use your eyes to follow the blade that’s in water. You also need to concentrate on pushing your power against the paddle shaft, using your upper hand in the movement.
In the release phase, when your hand is now just to the rear of your hip, create a “slicing” movement with the blade, lifting it out of the water.
In order to repeat the stroke, you immerse the other blade in the water and proceed. Your torso should already be wound in the correct manner.
Tips to Remember for Good Technique
There are certain tips that you should keep in mind in order to ensure sound technique. These include:
- Concentrate on utilizing the strength of your core muscles to push forward with your stroke. Avoid focusing too much on your arms, which have weaker muscles. If you fail to use proper technique in this way, you’ll find yourself getting exhausted and sore more quickly. Injury also becomes more likely.
- You need to ensure that the blade is kept in an almost vertical orientation. It should also be maintained at a consistent (and full) level of being immersed in the water. This will help you travel more quickly and in a straighter path.
- Maintain your body in as upright as position as you can. This will assist you in keeping up good balance and make your kayak much more efficiently.
- Always remember the paddler’s box position as you stroke through the water. This will help to ensure that your body is properly positioned for every part of the stroke.
How to Stop a Moving Kayak
You can use a reverse stroke to brake your kayak when it’s in motion. You can also use a reverse stroke if you want to back up the kayak. Below is how you can do a reverse stroke:
- Drop step: To do the drop step of the reverse stroke, wind your torso and ensure your blade is fully immersed in the water next to your hip.
- Power step: Rotate the torso part of your body as the blade makes its way in front of you.
- Release step: Once the blade of your paddle is at an even level with your feet, do a “slicing” motion to bring the blade out of the water.
To repeat the reverse stroke, immerse the blade that is out of water on the other side of the kayak that is next to your hip. Your torso should already be properly positioned by this point.
Now You Know the Basic Proper Kayak Paddling Technique
Remember that you should take lessons with a guide or instructor in order for you have all the knowledge and skills you need in order to kayak safely and effectively.
Keep all the tips that we outlined in mind as you continue to learn. Remember that safety always comes first, especially when you’re a beginner.
Always use a life jacket / personal flotation device when you’re on the water. There are lots of comfortable, low-profile options which won’t inhibit you as you practice your kayak paddling technique.
